Social Icons

Pages

Saturday, December 3, 2011

Somali Sambusa


(prep time 20 mins)
(cook time 10 mins)
(makes about 15 sambusas)
Ingredients

Ground lamb 1 Lbs
Garlic 2 tsp (minced fine)
Serrano chili 1 large (chopped fine) *optional
Flat leaf Italian parsley 1 cup chopped
Green onions (chopped) 1/3 cup
Ground cinnamon 1/2 tsp
Ground cardamom 1/8 tsp
Ground nutmeg 1/4 tsp
Coarse black pepper 1/4 tsp
Ground cloves 1/8 tsp
Sumac 1/2 tsp
Olive oil 3 Tbs
Canola oil for deep frying

I used samosa wrappers from KG Pastry for wrapping these. This wrapper is different from the Indian samosa wrap. I was able to buy it only at Halal Meats (the tiny store inside the plaza next to Apna Bazar in Bellevue)

NOTE:
I also folded a few of these in wonton wrappers and I have to say there is a difference.The wonton wrappers were much thicker than the samosa wrappers. And after frying the wontons seemed harder and the samosa wrappers seemed very delicate and more flaky.

TIP: If you'd rather bake these instead of deep frying phyllo dough might work great. However using phyllo might not save you calories because lots of butter goes between the layers unless you used a low cal spray.

Method

Start by heating some oil in a frying pan.
Add the garlic and cook for about 30 to 45 seconds.
Add the beef, chilies and all the seasonings.
Cook until beef is done about 10-12 mins and make sure to break any lumps of meat with the back of a spatula.
Mix in the green onion and the parsley.
Allow this mixture to come to room temperature before you can start wrapping them.
I wished that the wrappers should have been atleast 12 inches long but the ones I had were only 8.5 inches.
So I wet the edges with some water and glued two wrappers together to make one long one.
Take about 2 Tbs of the mixture and wrap them in triangles.
Here is the video I learned from, however I just used plain 'ol water to seal the sambusa ends and not a paste like in the video.
Deep fry for 6 mins or until golden brown.
Super delish!

Read more ...

Tuesday, November 15, 2011

Scones, blackberry jam and clotted cream


I had been stuck on the idea of clotted cream for the past few days. It's a mildly sweet, spreadable thick cream, somewhat of a cross between unsalted butter and heavy cream. I had it with homemade scones and jam for breakfast but this meal is usually enjoyed in the afternoon with a cup of tea as a part of the famous cream tea which is very popular all across the UK.

It's next to impossible to get your hands on fresh clotted cream here in the US. The closest thing is a processed version (found in a tiny jar in the picnic food section of Cost Plus World Market) or Double Devon Cream (can be bought at Cost Plus World Market, Wholefoods and the The British Pantry). However I really wanted to taste the real deal and me being somewhat of a food nerd and after being told that the idea "sounds jolly good" I decided to make it in my tiny kitchen :-)  

Thanks to Google my hunt for raw unpasteurised cream was surprisingly short. I was able to locate a depot in Bellevue and all I had to do was make a call and collect it on Thursday morning. It's hard to describe the feeling I felt when I was holding a pint of raw cream from Jersey cows in my hands :-) A pint of cream took me over eight hours and I got about a third cup worth of clotted cream. The process for making this is very similar to making malai probably because clotted cream IS malai. However there is a HUGE difference in taste and texture between the two maybe because clotted cream is made from a better quality of milk or cream. 

The method is simple. Just pour the cream in a wide skillet, cover and cook on very low heat for several hours until a thick crust forms on the top. That yellowy, oily crust is clotted cream. Scrape it off and collect it in a small bowl. I found this recipe for clotted cream which makes it in an oven. However I made it on the simmer setting on my electric stovetop and scrapped off the crust every hour or so. The crust will form several times. In the end I had very little cream left in my skillet, I couldn't let it simmer further without making it stick to the skillet.

During my search for a recipe I found that people usually compare the taste of clotted cream with mascarpone, ricotta, heavy whipped cream or some mix of these ingredients. And after tasting it, it is my very humble opinion that clotted cream is also comparable to softened khoya - Milk solids made from evaporating milk, an ingredient very commonly used in Indian/Pakistani desserts and can be easily bought from an Indian grocery store.

Scones

I followed a recipe from America's Test Kitchen, a version of it can be found here.
However I never used any currants or dried fruit and cut the recipe in half.
For the sake of completion I have copied the recipe below with the quantities that I used.
Dreamy Cream Scones
America’s Test Kitchen Cookbook
1 cup (5 ounces) unbleached all-purpose
1/2 tablespoon baking powder
1 1/2 tablespoons sugar
1/4 teaspoon salt
2 1/2 tablespoons chilled, unsalted butter, cut into 1/4-inch cubes
1/2 cup heavy cream

1. Adjust oven rack to middle position and heat oven to 425°F.
2. Place flour, baking powder, sugar and salt in large bowl or work bowl of food processor fitted with steel blade. Whisk together or pulse six times.
3. If making by hand, use two knives, a pastry blender or your fingertips and quickly cut in butter until mixture resembles coarse meal, with a few slightly larger butter lumps. Stir in currants. If using food processor, remove cover and distribute butter evenly over dry ingredients. Cover and pulse 12 times, each pulse lasting 1 second. Transfer dough to large bowl.
4. Stir in heavy cream with a rubber spatula or fork until dough begins to form, about 30 seconds.
5. Transfer dough and all dry, floury bits to countertop and knead dough by hand just until it comes together into a rough, sticky ball, 5 to 10 seconds. Form scones by either a) pressing the dough into an 8-inch cake pan, then turning the dough out onto a lightly floured work surface, cutting the dough into 8 wedges with either a knife or bench scraper (the book’s suggestion) or b) patting the dough onto a lightly floured work surface into a 3/4-inch thick circle, cutting pieces with a biscuit cutter, and pressing remaining scraps back into another piece (what I did) and cutting until dough has been used up. (Be warned if you use this latter method, the scones that are made from the remaining scraps will be much lumpier and less pretty, but taste fine. As in, I understand why they suggested the first method.)
6. Place rounds or wedges on ungreased baking sheet and bake until scone tops are light brown, 12 to 15 minutes. Cool on wire rack for at least 10 minutes. Serve warm or at room temperature.

Blackberry Jam

Blackberries - Frozen 1 lbs
Sugar - 2 1/2 cups
Juice of half a lime
Apple peels and cores for natural pectin (I had saved some from a pie I had made a few days earlier)

Combine all the ingredients in a large pot.
Turn on the heat and allow the berries to welt.
Cook for about 5 mins and pass the fruit through a seive to remove seeds and apple peels.
Add the seedless fruit back into the washed pot and continue to cook for another 15 mins on medium high heat or until the mixture is reduced to 1/3 cup.
Pour into a clean jar and seal.
Finish within a week.


Read more ...

Friday, November 11, 2011

Apple Pie


Years ago, when I was a student, I used to really enjoy apple pie from a bakery (forgot the name) in Islamabad. It had coconut flakes and raisins mixed in with the apple filling.

I have been feeling very nostalgic lately and decided to make an apple pie similar to the one I used to love. Good 'ol times, how much I miss it all :-(

I used a small 7" pie pan, so three small apples were enough to fill it up. While I was searching for a great recipe I found this picture and thought it looked really nice. So I tried to emulate the look using apple and leaf shaped mini cookie cutters. I also used the recipe on that page as a guide.

(prep time 20 mins if using prepared pie crust)
(bake time 45 mins)
(enough for 4 ppl)
Ingredients

2 Pie crusts or use store bought
3 Apples - small size (granny smith, honey crisp, red delicious)
Juice of 1/2 lime
2 Tbs Heavy cream
2 Tbs Butter (chopped into small pieces)
1 Tbs Flour
1/4 tsp Cinnamon
1/8 tsp Nutmeg
1/4 cup Brown sugar
1/8 cup Regular sugar
1/3 cup Coconut flakes-sweetened  *optional
1/3 cup Raisins - I used golden raisins *optional
1 egg - for eggwash


Method

Line the bottom of a buttered and floured pie dish with one of the pie crusts.
Use a knife to cut off the over hang.
Set aside and refrigerate the pie dish.
Peel and core the apples and slice them thinly.
Put the slices in a large bowl and sprinkle some lime juice on them to prevent browning.
Add the sugars, spices, flour, cream, butter, coconut and raisins and combine well.
Pour this mixture into the pie dish and cover with the decorative crust.
I saved a few slices and arranged them in a neat pattern on the top layer. I figured it would look nice because it will show through the cut outs. But now I think it would have looked better had I not done that, specially because some of the apple pieces got really brown. 
Apply some eggwash on top of only the crust and bake in a preheated 450 oven for 15 mins.
Then reduce the temperature to 350 and cook for another 30-45 mins.
I had to cover the edges of the pie with aluminum foil to prevent over browning.
I removed the foil in the last 15 mins of baking.
Let this sit for 30 mins at least.
You can eat this warm or at room temperature.
Enjoy.
Read more ...

Tuesday, November 1, 2011

Pecan Pie

Ooey gooey good :-)
This was incredibly delicious... mmm. I made several versions of it and below is what I liked most. I cook the syrups for a while for an extra sticky texture and I also prefer using a prebaked pie crust for a super duper flaky pastry!

(makes one 10" pie)
(prep time 15 mins if using store bought pie dough otherwise and another hour or so)
(cook time 45 mins)
Ingredients

1 Pie crust or use store bought
1/2 cup Maple syrup
1 cup Light corn syrup
1/2 cup Agave nectar
2 Large eggs (At room temperature and lightly beaten)
4 Tbs Butter (Melted)
1 3/4 Cups pecans or use walnuts for a walnut pie
1 tsp Vanilla
1/2 tsp salt


Directions

Pre heat oven to 350 degrees.
Butter and flour a 10"pie dish and refrigerate it for 10-15 mins.
Roll out the pastry and place it inside the pie dish. Poke a few holes all around the inside of the crust with a fork.
Place this in the fridge for 20 mins or so. We want to make sure that the pastry is very cold.
When you are ready to bake the pie crust place a piece of aluminum foil on top of it and use some uncooked dried beans or baking beads to prevent the pastry from puffing up.
Bake for 12-15 mins.
Take out it from the oven, remove the weights and let it cool down to luke warm atleast before you fill it up with the pecan filling.

For the Filling:

Combine the vanilla, salt, agave, maple and corn syrup in a sauce pan.
Cook over medium heat for 5-6 minutes.
Let this cool down to room temp.
Pour in melted butter and mix well and then fold in the eggs.
Add whole pecans .
Pour this mixture into the pie shell.
Bake for 40-45 min in pre-heated 350 degree oven.
Or until a knife inserted in the middle comes out clean.
The middle should be slightly wobbly but it will set when cooled.
Let it cool down completely before eating.
Also tastes great super chilled.

Read more ...

Monday, October 17, 2011

Chicken Pot Pie


A wonderful delicious treat during the winters.
Warms you up inside out.
I love this with some cottage cheese and chopped Italian parsely on the side.

Ingredients

2 Pie Crusts (the bottom crust is blind baked for only the first 10 mins and then cooled)
You can always use store bought pie crusts to save on time.
However the above recipe is the most flakiest ever. Definitely try and make it if you have the time.

1 1/2 Chicken breasts - medium sized, skinless, boneless (cut into 1" pieces)
1 tsp Garlic (minced fine)
4 Tbs Onion (diced fine)
4 Crimini mushrooms (diced fine)
1 cup Carrots (sliced at a bias about 1/4" thick)
1 cup Celery (sliced at a bias about 1/4" thick)
1 cup Boiled potatoes (cut into 1" cubes)
1/2 cup Frozen Peas *optional
1 can Chicken stock
1 1/4 cup Whole Milk * see note below
1 tsp Thyme (dried)
1 tsp Tarragon (dried)
2/4 tsp Chili flakes *optional
1/4 tsp Pepper
2 Tbs Oil for cooking (I used canola oil)
Salt

For the roux:
3 Tbs flour
3 Tbs butter

For the egg wash:
1 Egg mixed in with 1 Tbs of water.

Method

Before getting started, you will need to blind bake the first pie crust.
See instructions here and here.
The recipe and method are exactly the same.
The only difference is that for the chocolate tart the crust was baked twice. However for this recipe I only baked the crust once for 10 minutes with the weights.

Blanche the carrots and celery by plunging them in boiling water for 2 mins and then plunging them into ice water right afterwards.
When the veggies have cooled down, drain them and set aside for later use.
Heat up some oil in a frying pan and cook the chopped onion until soft.
Add the garlic for 30 seconds or until fragrant.
Now add the mushrooms and cook on a med high heat for about 4-5 mins or until the mushroom are cooked through.
Take out in a bowl and set aside.
Heat about a tablespoon of oil in a skillet and brown the chopped chicken on high heat until they are nice and light brown on the outside.
Season with salt, pepper, thyme, tarragon and chili flakes.
Now add chicken broth and milk to the pan.
Bring it all to a boil, reduce heat and cook the chicken for about 6-8 minutes or until cooked through.
In a separate frying pan melt the butter and add flour to it.
The roux will be used to thicken the broth.
Make sure you use equal parts fat and flour otherwise you might risk lumps in your sauce.
And depending on how you want the color of the sauce to be you can cook your roux till it's white, blonde or brown.
I cooked mine for about 1-2 minutes on med heat for a white roux.
Add this to the broth and stir gently until well combined.
Turn off heat.
Let this cool for about 15 mins and then gently fold in all the veggies.
Carrots, celery, potatoes, mushroom mixture and peas if you are using them.
Allow this to cool further and reach room temperature before pouring it into the blind baked pie shell.
The half baked shell and the cold sauce will ensure that the bottom crust will not turn soggy during baking.
Cover with the second pie crust.
Seal in the crust all around.
I don't like fancy edges on a chicken pie. So I don't bother fluting the edges, I just make sure that it looks neat.
Paint egg wash all over.
Cover the edges of the pie with aluminum foil. This will protect then from browning too quickly.
Make a few vent holes in the center.
Bake for 45 mins in a pre-heated oven at 450 degrees.
Remove the aluminum foil in the last 15 mins of baking.
Let this rest for 20-30 minutes before digging in.
Enjoy.


*I perfer the sauce to be a bit on the runny side, this isn't.
However I adjusted the recipe that I shared above so that it will have more sauce.
But if you perfer less/thicker sauce then take out 1/4 cup of milk and add an additional tablespoon of roux.


Read more ...

Friday, September 30, 2011

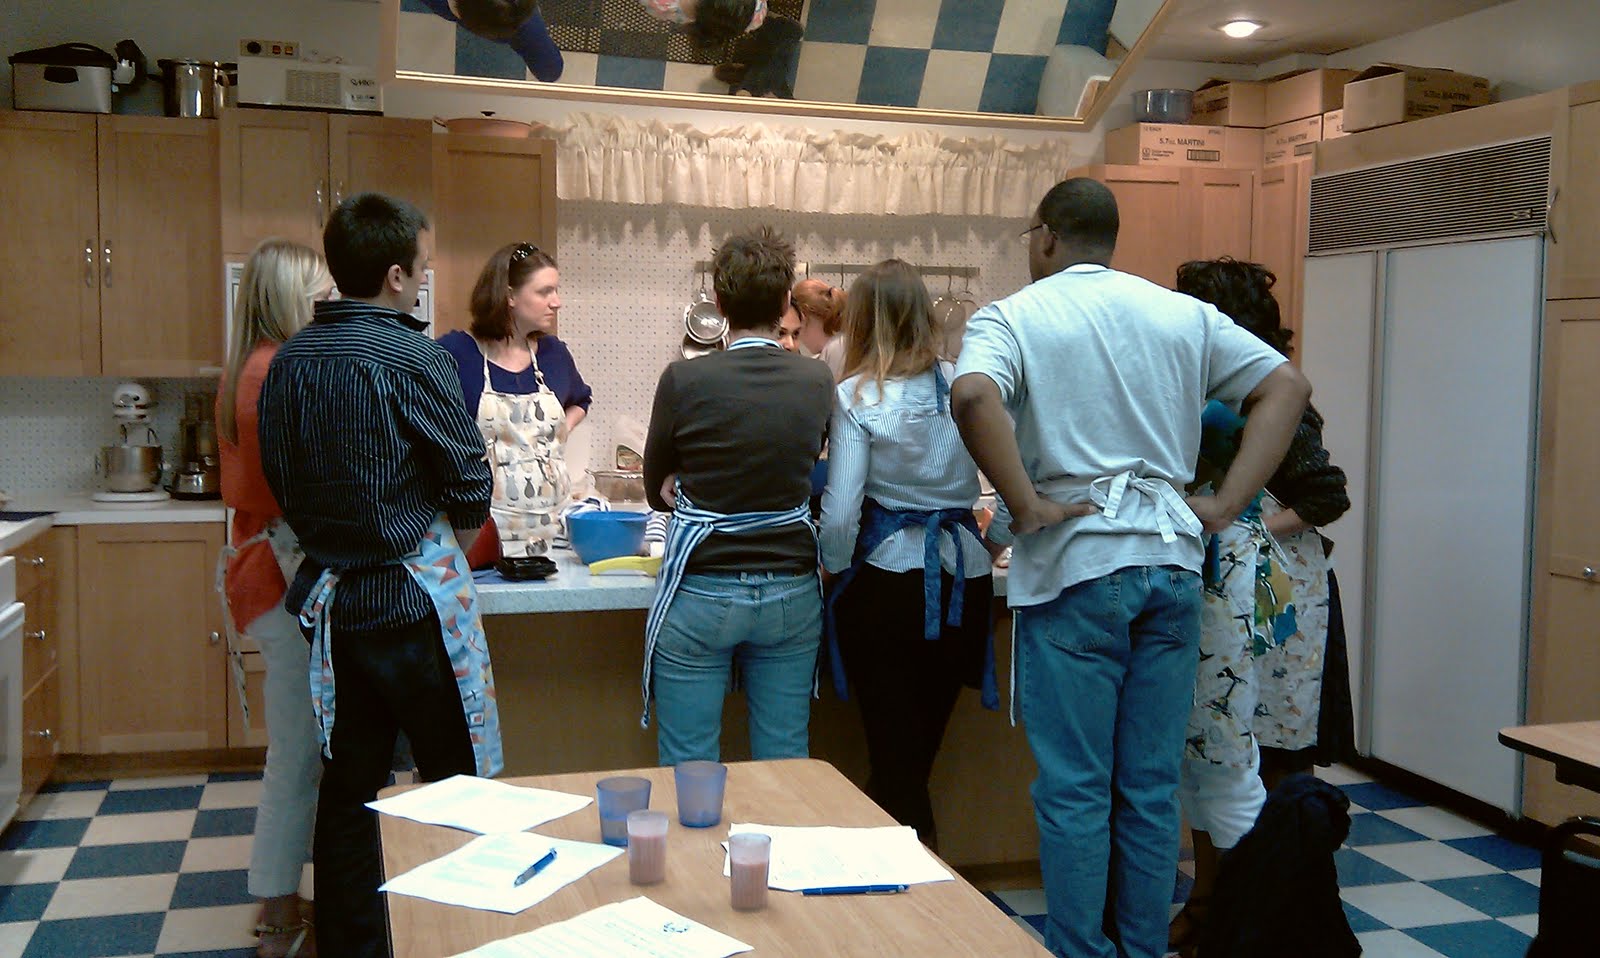
Class today!


Another great class.
Great people great food and lots of fun
Too bad I never got the recipe for "lefzeh"
Read more ...

Tuesday, August 23, 2011

Indian Camp Food: Day 1 (Meat lovers lunch)

Cooking in little pouches made of heavy duty aluminum foil is a great way to cook outdoors!
You don't need to carry pots and pans or a grill, you can simply toss the packets on the embers in a fire pit.

The possibilities are numerous. You can be very imaginative with these. I perfer to assemble the pouches on location, but you can of course prepare them with various flavors at home, freeze them and be absolutely hands free on the camp ground. 

I am sharing two types of Indian/Pakistani inspired chicken recipes below.
Before getting started, please read the about the shopping list right here.


Menu
Chicken Dopiaza
Chicken Jalfrezi
Vegetable Pulao

Chicken Dopiaza:


I cut up a breast and a half of chicken into approx 1 1/2" pieces.
Mixed in some fresh ground garlic, roughly a tsp, and froze it the night before.
Make sure the meat is thawed completely before you start cooking this.
Lay flat a large sheet of aluminum foil and arrange the chicken meat in a single layer on top of it.
Some fresh slices of onions and green chilies.
Add 2 Tbs of yogurt (optional),  4 Tbs of onion paste and 2 Tbs of tomato chutney.
Sprinkle some oil, salt, pepper, coriander, black cumin (added it later can't see it in the video) and chili flakes on top.

Mix it all well and wrap up snugly in 2 sheets of aluminum.
Cook on a medium grill for 30 to 40 mins turn sides once you are halfway into the cooking time.

Chicken Jalfrezi:


Very similar procedure as the chicken dopiaza.
I cut up a breast and a half of chicken into approx 1 1/2" pieces.
Mixed in some fresh ground ginger, roughly a tsp, and froze it the night before.
Lay the chicken on a flat piece of aluminum (shiny side in).
Add about 4 Tbs of chopped tomatoes and green bell peppers.
A few strips of green chilies.
I used 4 heaped Tbs of tomato chutney and 2 Tbs of onion paste.
Sprinkle some oil, salt, pepper, coriander, and chili flakes.
Mixed it all up and wrapper it up snugly.
See video on how to wrap i t up.
Cook for 30-40 mins on a grill, turn sides once in between!

Here is a demo on how I wrapped it all up.
If you are planning to cook this in a fire pit I would probably add a third layer of aluminum sheet to be very safe.


Vegetable Pulao:

Add some water (according to package instructions) in an aluminum loaf pan.
I had marked the loaf pan beforehand so I'd know exactly how much water I would need.
Season it with salt, black cumin and mix in the rice.
Cook on a grill alongside the chicken pouches.
Even though the package said 10 mins, It took the same amount of time as the chicken (30 mins)
Mix in the drained canned vegetables once cooked.


Finale:


Read more ...

Indian Camp Food:The Preperation

This should be perfect for a weekend camping trip for two people.
I tried to keep the ingredient list as small as possible, with a little planning ahead you won't need to carry a bulky cooler. You can always use fresh vegetables if you can carry it easily. Whenever possible I got stuff that had little or no salt added to it.


Shopping List:
  • Canned mixed vegetables
  • Canned kidney beans
  • Canned potatoes
  • Canned chicken sausage
  • Fresh onion, tomato, bell pepper, 2 green chilies
  • PAM for grilling.
  • Some cooking oil (can't see in the picture)
  • 6 eggs (can't see in the picture)
  • Thin Poha (flattened rice grains)
  • Uncle Ben's 10 min rice.
  • Assorted spices. I am a little nerdy when it comes to spices. I hate using the pre-mixed stuff. So I carried a few of my favorites in a 7 day pill box. Salt (I used kosher salt because it is coarser and won't spill easily out of the box), pepper, black cumin, fenugreek leaves, coriander powder, chili flakes, and nigella seeds.
  • Frozen meat. I froze all the meat the previous night and carried it with me in an insulated bag with a few ice packs. 
  • Tomato chutney*
  • Onion paste** (2 medium sized red onions sliced thin, fried till dark brown and then ground up)
*You can use a jar of pre-made curry paste.
** Use already fried onions that you can get in a bag. You can find this easily in an Indian store, I am sure there is a name for that, but I can't seem to remember it at the moment.

Utensils:
  • Knife
  • Can opener
  • Propane Grill
  • Lighter
  • Tongs
  • Aluminum foil
  • I packed a sieve to drain the liquid from the canned veggies, but realised that you don't really need it.
P.S.
I really really wanted to make these videos while I was out, but I don't think I will get a chance to go camping before the summer ends :-(
So I made them anyways in my backyard just for you guys using only the utensils and ingredients listed above. I am sure you won't have a problem making any of these outdoors!
Read more ...

Sunday, August 14, 2011

Tomato Chutney


This is fairly easy to make.
Very versatile.

Large Roma tomatoes (chopped) 6
Whole dried red chilies 3-4
Salt 1 tsp
Canola oil  2-3 Tbs
White wine vinegar 1/4 cup
Heat some oil in a pan.
Add the tomatoes, the chilies and the salt all at once.
Cook for 45 min on medium high heat or until the tomatoes are mushy and well cooked.
Add the vinegar and cook for another 5-7 mins.
Blend well and store in a clean glass container.
Done.
Read more ...

Friday, August 5, 2011

Goat Chops

This marks my 100th post!
Hurray hurray!


Ingredients

Goat chops about 10 pieces
Greek yogurt 1/3 cup
Garlic 2 Tbs (minced)
Ginger 1Tbs (minced)
Serrano chilies 3-4 medium size (cut into chunks)
White wine vinegar 2-3 Tbs
Roasted cumin powder 1 1/2 tsp
Coriander powder 2 tsp
Cardamom powder 1/4 tsp
Fennel seed powder 1/8 tsp
Cayenne pepper 2/3 tsp (adjust according to your preference)
Pepper 1/2 tsp
Garam masala 1/2 tsp
Salt

Method

Combine all the ingredients together minus the salt and rub it over the goat chops.
We don't add salt to the marinade because it will draw out all the moisture from the meat.
Let this sit in the fridge over night or at least 4 hours.
Season with salt just before cooking.
Cook in a pressure cooker for 20 minutes at the level II setting (medium).
Remove the chops from any liquid that is left over from the yogurt.
Add some canola oil in a frying pan and fry the chops for about 1-2 mins per side on medium high heat.
We do this to add a nice brown color to the chops.
Great with plain yogurt and naan.
Enjoy :-)

Read more ...

Thursday, August 4, 2011

Class today

What a fantastic group of people!
Thanks so much Diane for all your help, you did a fantastic job!
As always had a blast.
Sharing some of the pics.
Cutest couple of the year Max and Oriana :-)


Read more ...

Thursday, July 14, 2011

Class today

:-)
I love doing this.


Read more ...

Friday, May 27, 2011

Phở - Vietnamese Noodle Soup

I love Pho!
It's love in a bowl!
You need to love it just as much as I do for us to be friends!

Pho Than Brothers is hands down the best deal in town!
And they are 2 blocks away from me so I can go there anytime I want.
I would never make this at  home... but I had some leftover chicken broth and some rice noodles in the back of my pantry, so I thought why the heck not.
I added some onion slices, rice noodles and shredded chicken to the broth.
Some bean sprout, lime, jalapenos slices and Thai basil on the side.
I prolly could have done a better job at this :-)

Read more ...

Wednesday, May 11, 2011

Megha's Paneer

Uff.... I can't count the number of days when I have woken up CRAVING this incredible paneer! For the longest time ever I have always asked Megha to make it for me and then it got a lil embarrassing :-)
This is her recipe that I am sharing.
Trust me you won't regret making this!
Very easy, and extremely flavorful!
This is perhaps the only reason I am glad Samant doesn't eat onions (or so he thinks) :-D


(cook time 20 mins)
(serves 3-4)
Ingredients

Paneer 2 cups (cut into 1" cubes and lightly fried) Homemade tastes best!
Raw cashews 1/4 cup
Raw peanuts 1/4 cup
Sesame seeds 3 Tbs
Whole coriander seeds 1 Tbs
Whole dried chillies 2-3 (adjust to what taste buds like)
Yogurt 1/2 cup
Brown sugar or Jaggery 1 tsp
Turmeric 1/4 tsp
Fenugreek leaves - Kasoori Methi 2 tsp
Water 2-3 Tbs
Salt
Butter 2 Tbs

Method

You will need to roast some of the ingredients.
Place a large frying pan on medium high heat.
Begin with the chillies, peanuts and cashews and roast them for about 2 mins, stir them once or twice.
Add the sesame and coriander seeds and continue to roast for another 3-4 minutes or until all the ingredients are lightly toasted.
Let these cool a bit.
Add yogurt, water and use a blender to blend this into a coarse paste.
Return this to the frying pan and mix in the paneer cubes.
Season with salt, turmeric, sugar and fenugreek leaves.
Simmer on low for 5-8 mins. Stir once in between.
Turn off the heat and melt some butter on top.
Done!
Great with naan.

Read more ...

Saturday, May 7, 2011

Pasta With Creamy Lemony Fish Sauce

How gorgeous is this pasta? Each strip is a natural flavor from tomatoes, spinach, different colored bell peppers. I was so excited when I saw these. I decided to make a quick fish sauce to go along with it.


(prep time 20 mins)
(serves 2)
Ingredients

White fish (I used Dover sole, but halibut would be better) 1/2 lbs cut into large chunk
Garlic 1 Tbs (minced)
Juice from 1 large lemon
Chili flakes 1/2 tsp - use more or less if you prefer
Butter 1 Tbs
Cream 1/3 cup (I used 36% fat)
Pepper 1/8 tsp
Parsley leaves 2 Tbs (roughly chopped)
Salt

Method

Melt some butter in a frying pan.
Add the garlic and cook for 30 seconds.
Add the fish and season with lemon juice, salt, pepper and the chili flakes.
Lower heat to medium and cook for 3 mins.
Add the cream and cook until the fish is done. Dover sole cooks really quick, about 3-4 mins.
Turn off heat and sprinkle the parsley leaves on top.
Serve along aside the pasta.


A word about the pasta

Add this pasta to salted boiling water. I also added a little lemon juice to the water to prevent the colors from fading. Boil for 12-14 and drain. Don't ever wash cooked pasta with water, instead pour a tablespoon of olive oil to make it glossy.


Read more ...